Canalblog
Suivre ce blog Administration + Créer mon blog

easyclay

Articles récents
14 juillet 2006

Slab building

"Easyclay" is the English translation of a French blog called "modelagefacile". Using the Internet, we were unable to find a translation in the ceramics dictionary and we asked our Australian and American friends for help in the translation of our texts.  It is a rather important work which is added to the drafting of our texts.

We will publish two or three exercises  in English. After completion of these projects, please let us know if you want us to continue with more projects. Please contact us using the "Commentaires"(in English or French)  below. We will make our decision based on your comments.

Create a decorative "picture"
in less than one hour

plaque

1. Cut off a piece of clay as large as your two fists (for cutting, you can use a piece of wire or a knife).

2. Knead the clay thoroughly to avoid bubbles of air.

3. Flatten the clay with a rolling pin on an oily cloth. If small blisters appear, pop them with a pin and rouleau_bonsmooth again the clay with the rolling pin.
Note - When working with a larger piece or a bigger surface, it is easier to put the roller on two guides ( not required for this exercise ).
                                                                                                

4. Cut out an irregular shape from your slab. The edges should have a ragged look. You can make an outline of your design with a pastry wheel.Cut on the dotted outline, so the dechirurebonedges are irregular.
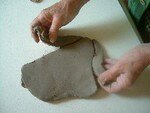
5. On a sheet of paper, draw a simple design which you will use as a model ( flower, animal, character etc ). If you do not have any ideas, look for some basic drawings in a children's book. Do not over complicate.

6. Engrave your drawing on the slab with a toothpick . Smooth the inside of the drawing and to give it a contrast, you can scratch the background with a fork. Your design will stand out more.gravure_ok

7.Add some details to finish your work. For the sample in the photograph, I created the hair by sticking pellets of clay onto the slab.

8. Let the slab dry on a wooden board covered with newspaper. To prevent edges from rising, cover them with a piece of newspaper and place a heavy item on them (ashtray, weight, books etc).

Make sure it is not too heavy to leave an imprint on your artwork.

Fire it at 980C°. You will get a "biscuit".

Good work!!!


Publicité
18 juin 2006

pear

"Easyclay" is the English translation of a French blog called "modelagefacile". Using the Internet, we were unable to find a translation in the ceramics dictionary and we asked our Australian and American friends for help in the translation of our texts.  It is a rather important work which is added to the drafting of our texts.

We will publish two or three exercises  in English. After completion of these projects, please let us know if you want us to continue with more projects. Please contact us using the "Commentaires"(in English or French)  below. We will make our decision based on your comments.

1.In one hour, without tools,
your first creation:

poire_bord_e1earthenware pear height: 15cm

Proceed as follows:
1. Form a ball of clay the size of your fist.

2. without wetting your hands, dig the ball with your thumbs. The other fingers will remain outside to guide you.

3. Thin the wall gradually by turning the ball gently until you obtain a small bowl.
Perform this operation swiftly so that the clay does not dry out.

4. Caution: the next step is somewhat complicated.
Place small pieces of clay one at time on the inside edge, at the top, in order to decrease the boulettes_okdiameter of the bowl's opening. Continue this procedure row by row, while unifying the interior gently and gradually decreasing the diameter.

5. When, in step 4, the diameter is reduced to a small opening, form a chimney and close by pinching the top.

6. The air is trapped, providing support to the work. By carefully tapping the outside of the ball with a wooden spatula, you are able to modify, reshape the ball to form  a uniform, spherical or oblong shape.

7. Look at your form attentively and see what it calls to your mind (animal, fruit, character etc).

super_queue_adobe8. You do not have to do anything else but to add some details to give birth to an original work. My work ressembled a kind of pear. I continued the chimney to form the tail, and I stuck in two leaves. (please, read § 9 for the details of the procedures)

9. To join the leaves or other details:
a. Flatten a ball of clay with the roller to obtain a 2/3mm thick slab. With a knife, cut out two leaves.
b. Add water to clay to obtain a mud of the consistency of yogurt (you can make tiny, dry pieces of clay in advance). It is called slip. Stripe the back of your leaves with the teeth of a fork and add some slip .
c. Stipe the site coarsely, where your leaves will come to be placed and put a little slip at this place.
d. Apply the leaves to the selected places and press slightly so that your joining is durable. As yourcollage_ok clay ball is full of air, you will not deform it.
e. Dry it on a newspaper until the following day.
f. On the next day, when the clay is somewhat solidified, bore a hole below your work. This delicate operation is essential; otherwise your creation would burst while firing.
g. Let it dry for at least a week and keep it away from drafts.
h. Fire approximatively 980 degree Celsius you will obtain a biscuit.


Publicité
easyclay
Publicité
Derniers commentaires
Publicité